

We won’t be covering how to setup Clerk.com and their Social Connections to get the auth. This
guide assumes you already have all that setup.
1. Install the Slack integration package
2. Create a Slack integration
slack.ts
3. Define an Auth Resolver
Using yourTriggerClient instance, define a new Auth Resolver for the slack integration:
slack.ts
4. Define a job
Before we finish the Slack Auth Resolver, let’s create an example job that uses the Slack integration:slack.ts
byoSlack integration into the Job and using it by calling io.slack.postMessage.
5. Install the Clerk backend SDK
6. Import and initialize the Clerk SDK
slack.ts
7. Implement the Auth Resolver
Now we’ll implement the Auth Resolver to provide authentication credentials saved in Clerk.com for Job runs, depending on the account ID of the run.slack.ts
Bonus: Multiple Slack integration clients
If you want to also use Slack with your own authentication credentials, you can always create another slack integration with a differentid.
slack.ts
How to Trigger Job runs with an Account ID
Now that we have a working Clerk.com Auth Resolver for Slack we’re ready to start triggering jobs with an associated account ID. The way you do this is different depending on the Trigger type.Event Triggers
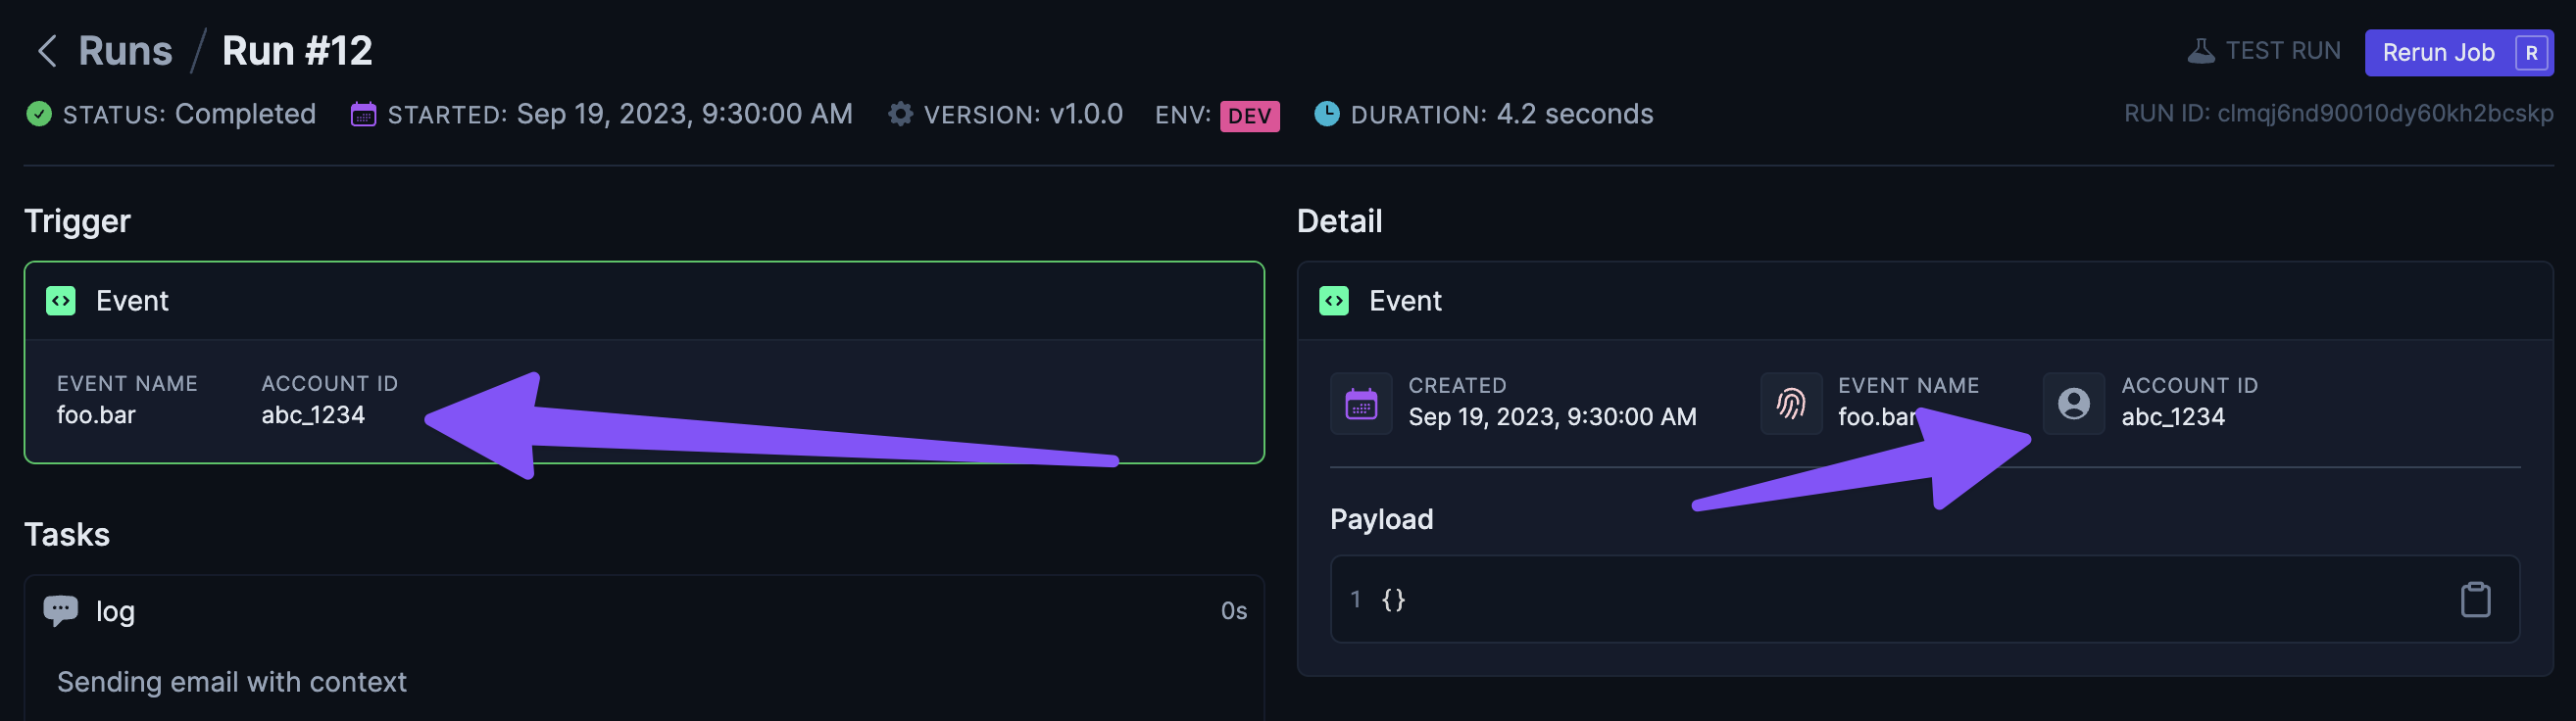
Jobs that have Event Triggers can be run with an associated account by providing anaccountId when calling sendEvent:
backend.ts
accountId value is completely arbitrary and doesn’t map to anything inside Trigger.dev, but generally it should be a unique ID that can be used to lookup Auth credentials in your Auth Resolvers.
You can also send events with an associated account ID from the run of another job:
anotherJob.ts
Scheduled Triggers
Running a job with an associated account ID that is triggered by a Scheduled Trigger works a bit differently than Event Triggers as you’ll need to convert your normalintervalTrigger or cronTrigger into using a Dynamic Schedule and then registering schedules with an associated account ID.
1. Convert a job to using a Dynamic Schedule
First let’s convert the following job from anintervalTrigger to a Dynamic Schedule:
dynamicSchedule.ts
2. Register a schedule
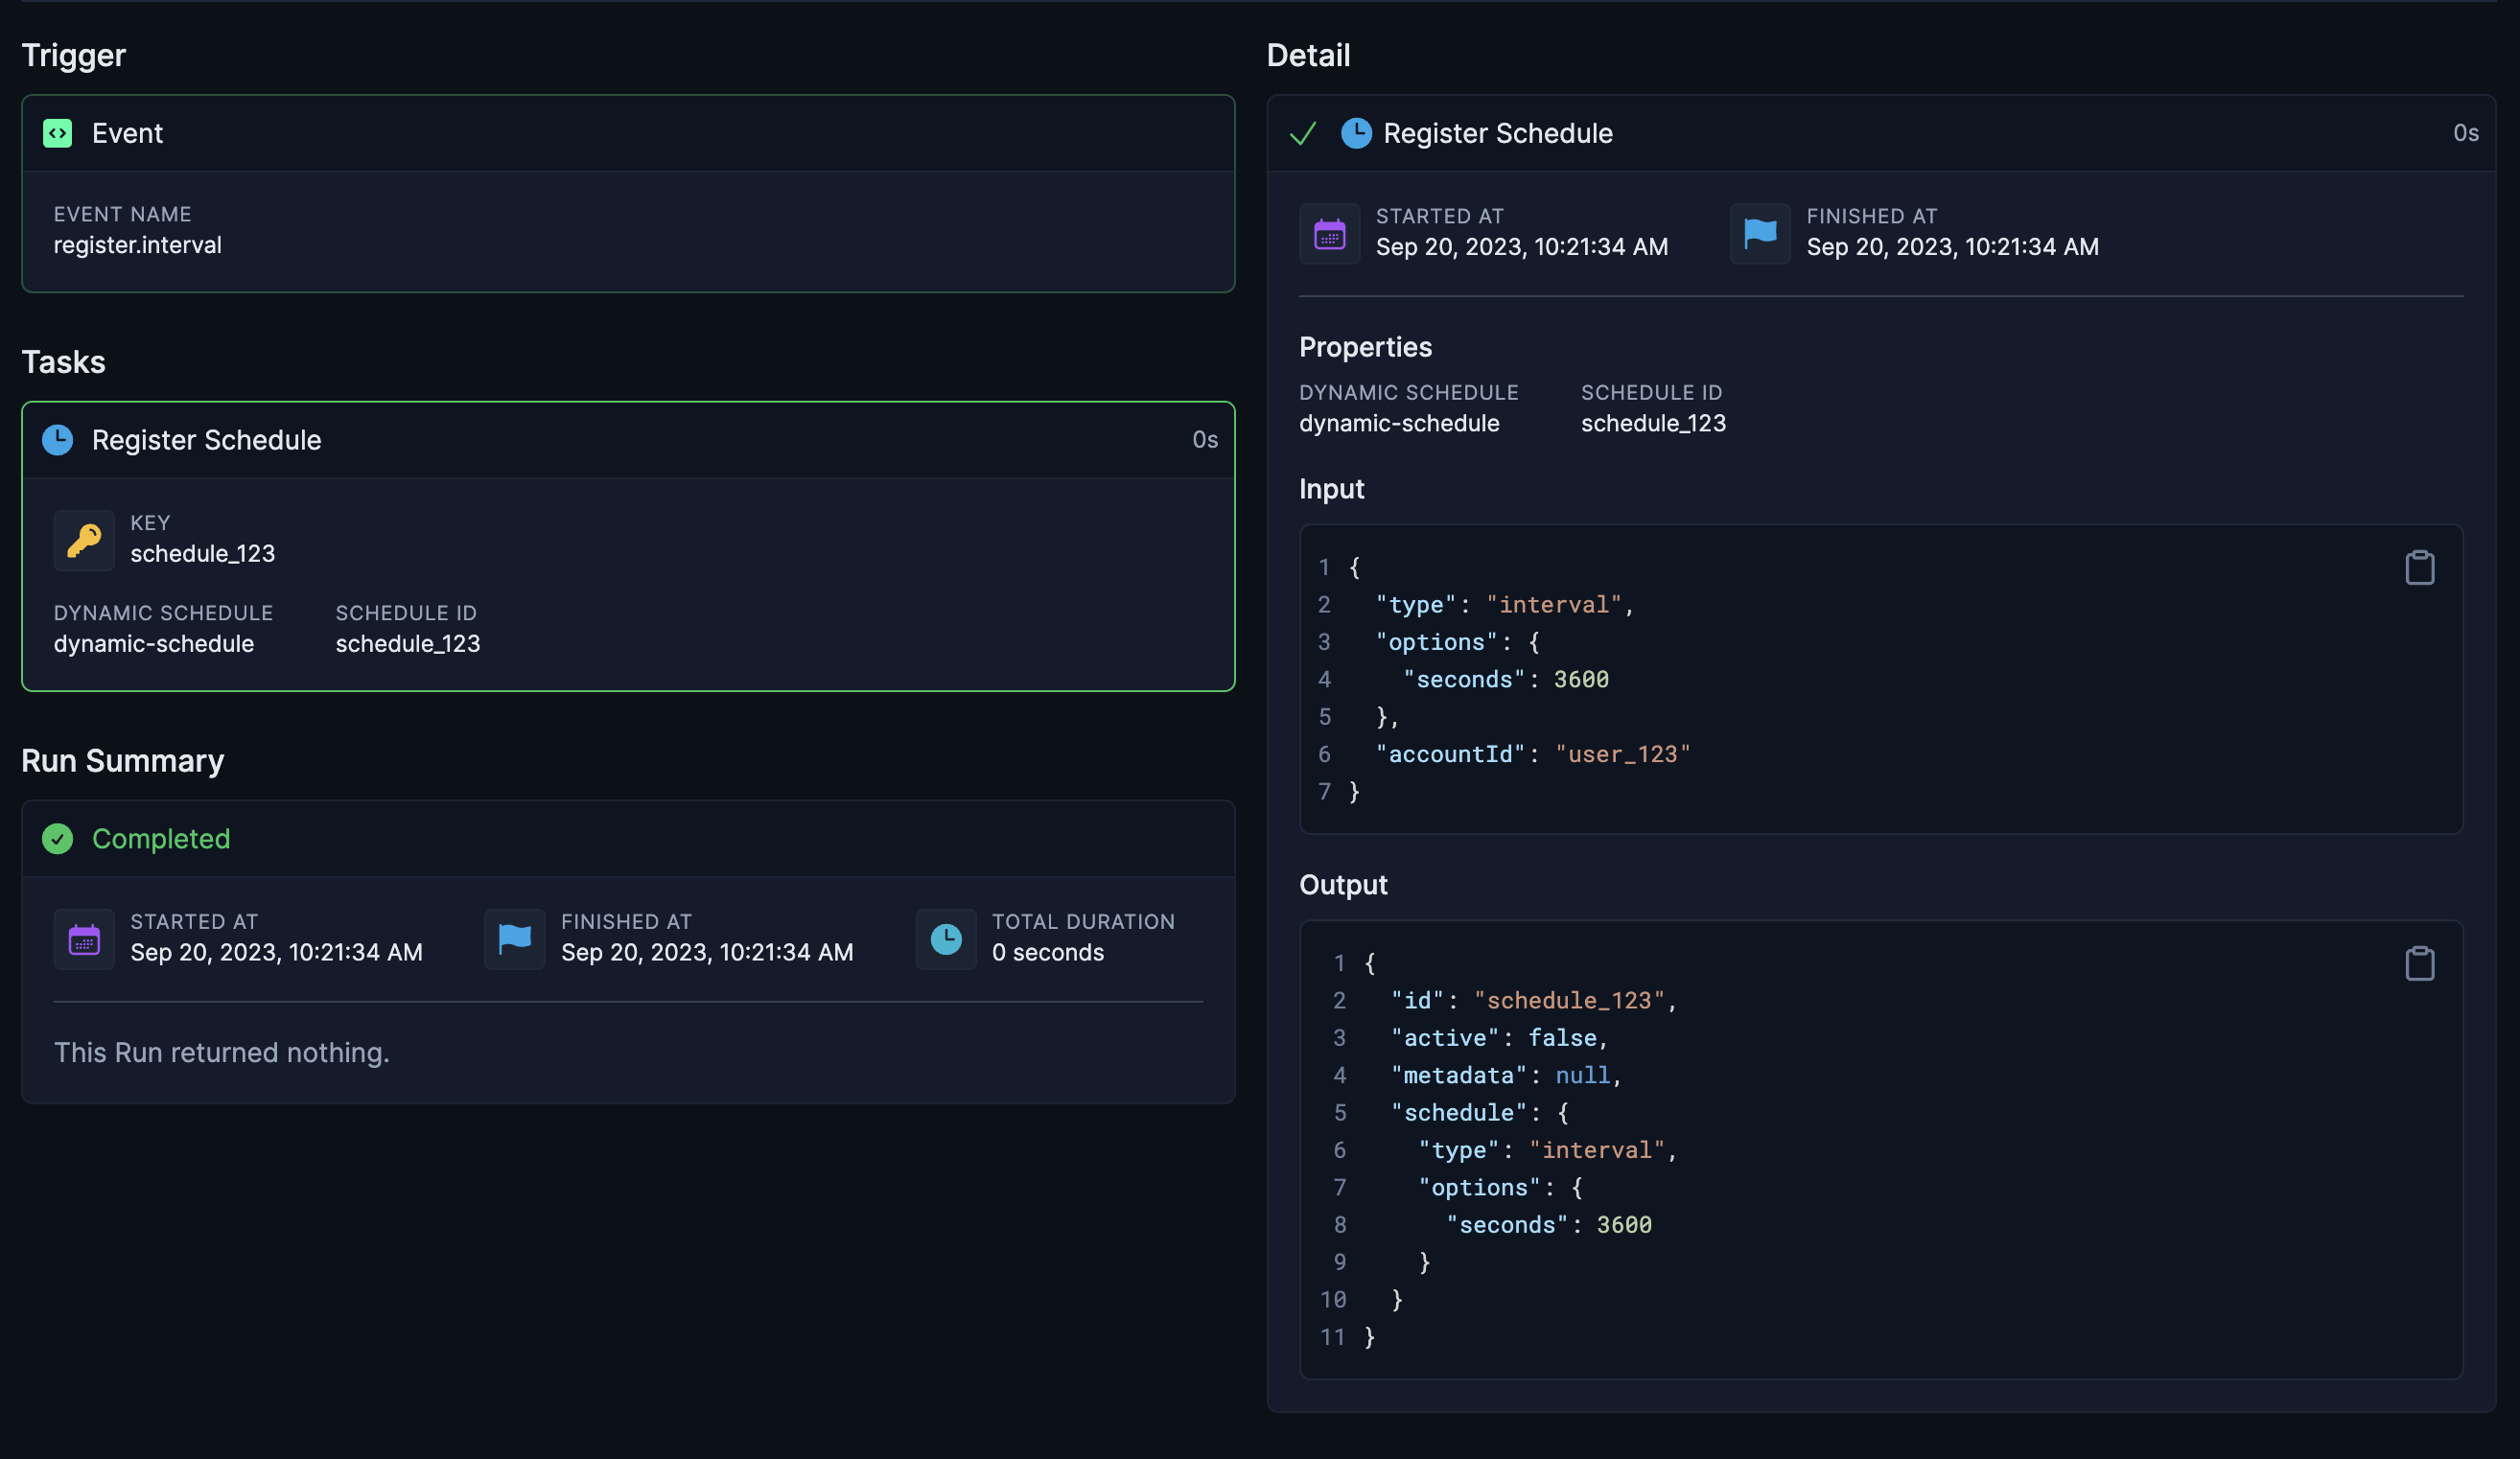
You can now use thedynamicInterval instance to register a schedule, which will trigger the scheduled-job:
backend.ts
accountId, so any runs triggered by this schedule will be associated with "user_123"
The first parameter above "schedule_123" is the Schedule ID and can be used to unregister the schedule at a later point:
backend.ts
otherJob.ts
Webhook Triggers
Running a job with an associated account ID that is triggered by a Webhook Trigger requires converting to the use of a Dynamic Trigger Dynamic Trigger’s work very similarly to Dynamic Schedules, but instead of registering schedules, you register triggers:1
Create Dynamic Trigger
Using the GitHub integration we’ll create a Dynamic Trigger that is triggered by the
onIssueOpened event:github.ts
2
Use the Dynamic Trigger
Now we’ll use the Dynamic Trigger to define a Job that is triggered by it:
github.ts
3
Define Auth Resolver
Define an Auth Resolver to fetch the GitHub OAuth token from Clerk.com:
github.ts
If you are using clerk, you’ll probably want to Add additional
scopes
to be able to do useful things with the GitHub integration. For example, if you plan on
registering GitHub triggers you’ll need
write:repo_hook and read:repo_hook or just
admin:repo_hook. If you want to create issues you’ll need repo or public_repo.4
Register a new trigger
Finally, we can register a new Trigger at “runtime”, either inside another Job run or in your backend:
github.ts
Testing jobs with Account ID
If a job uses any integrations with an Auth Resolver that requires an account ID, you’ll need to provide an account ID when testing the job: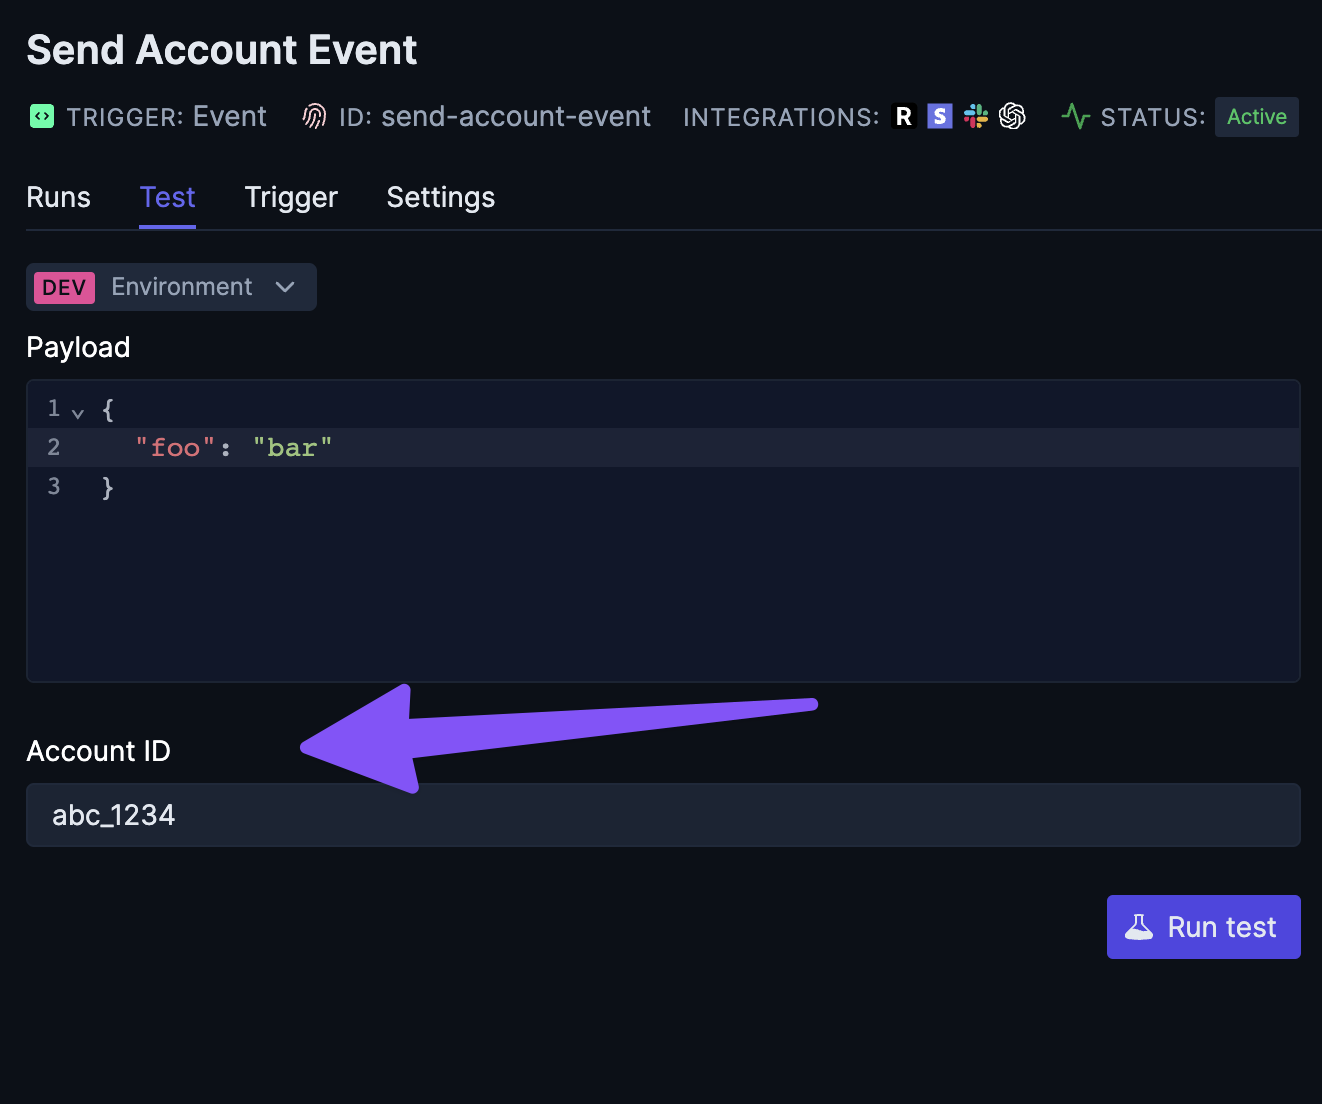
Auth Resolver reference
The Auth Resolver callback has the following signature:ctx parameter is the TriggerContext for the run and the integration parameter is the TriggerIntegration instance that the Auth Resolver is being called for. You can use the integration parameter to check the id of the integration to determine which integration the Auth Resolver is being called for:
additionalFields in the Auth Resolver result which will be passed to the integration when making requests. This is useful if you need to provide additional fields to the integration that are not part of the standard integration options.