Deploy self hosted version of Trigger.dev to Fly.io
You can use this repository as a jumping off point for deploying a self-hosted version of Trigger.dev on Fly.io using the Trigger.dev public docker image located at ghcr.io/triggerdotdev/trigger.dev:latest
Fork the repository mentioned above and change the app name
You should fork the repository before starting so you can make changes and commit them. For example, you’ll need to change the app property in the fly.toml file to be something other than app = "trigger-v2-fly-demo".
Follow the prompts by fly launch and make sure to answer them in the following way:
Do NOT get rid of your terminal output, we will need your database connection string shortly.
? Would you like to copy its configuration to the new app? Yes? Choose an app name (leaving blank will default to 'trigger-v2-fly-demo') <enter your preferred app name here or leave blank>? Would you like to set up a Postgresql database now? Yes? Select configuration: Development - Single node, 1x shared CPU, 256MB RAM, 1GB disk <- feel free to pick a beefier machine? Would you like to set up an Upstash Redis database now? No? Would you like to deploy now? No
AUTH_GITHUB_CLIENT_ID and AUTH_GITHUB_CLIENT_SECRET
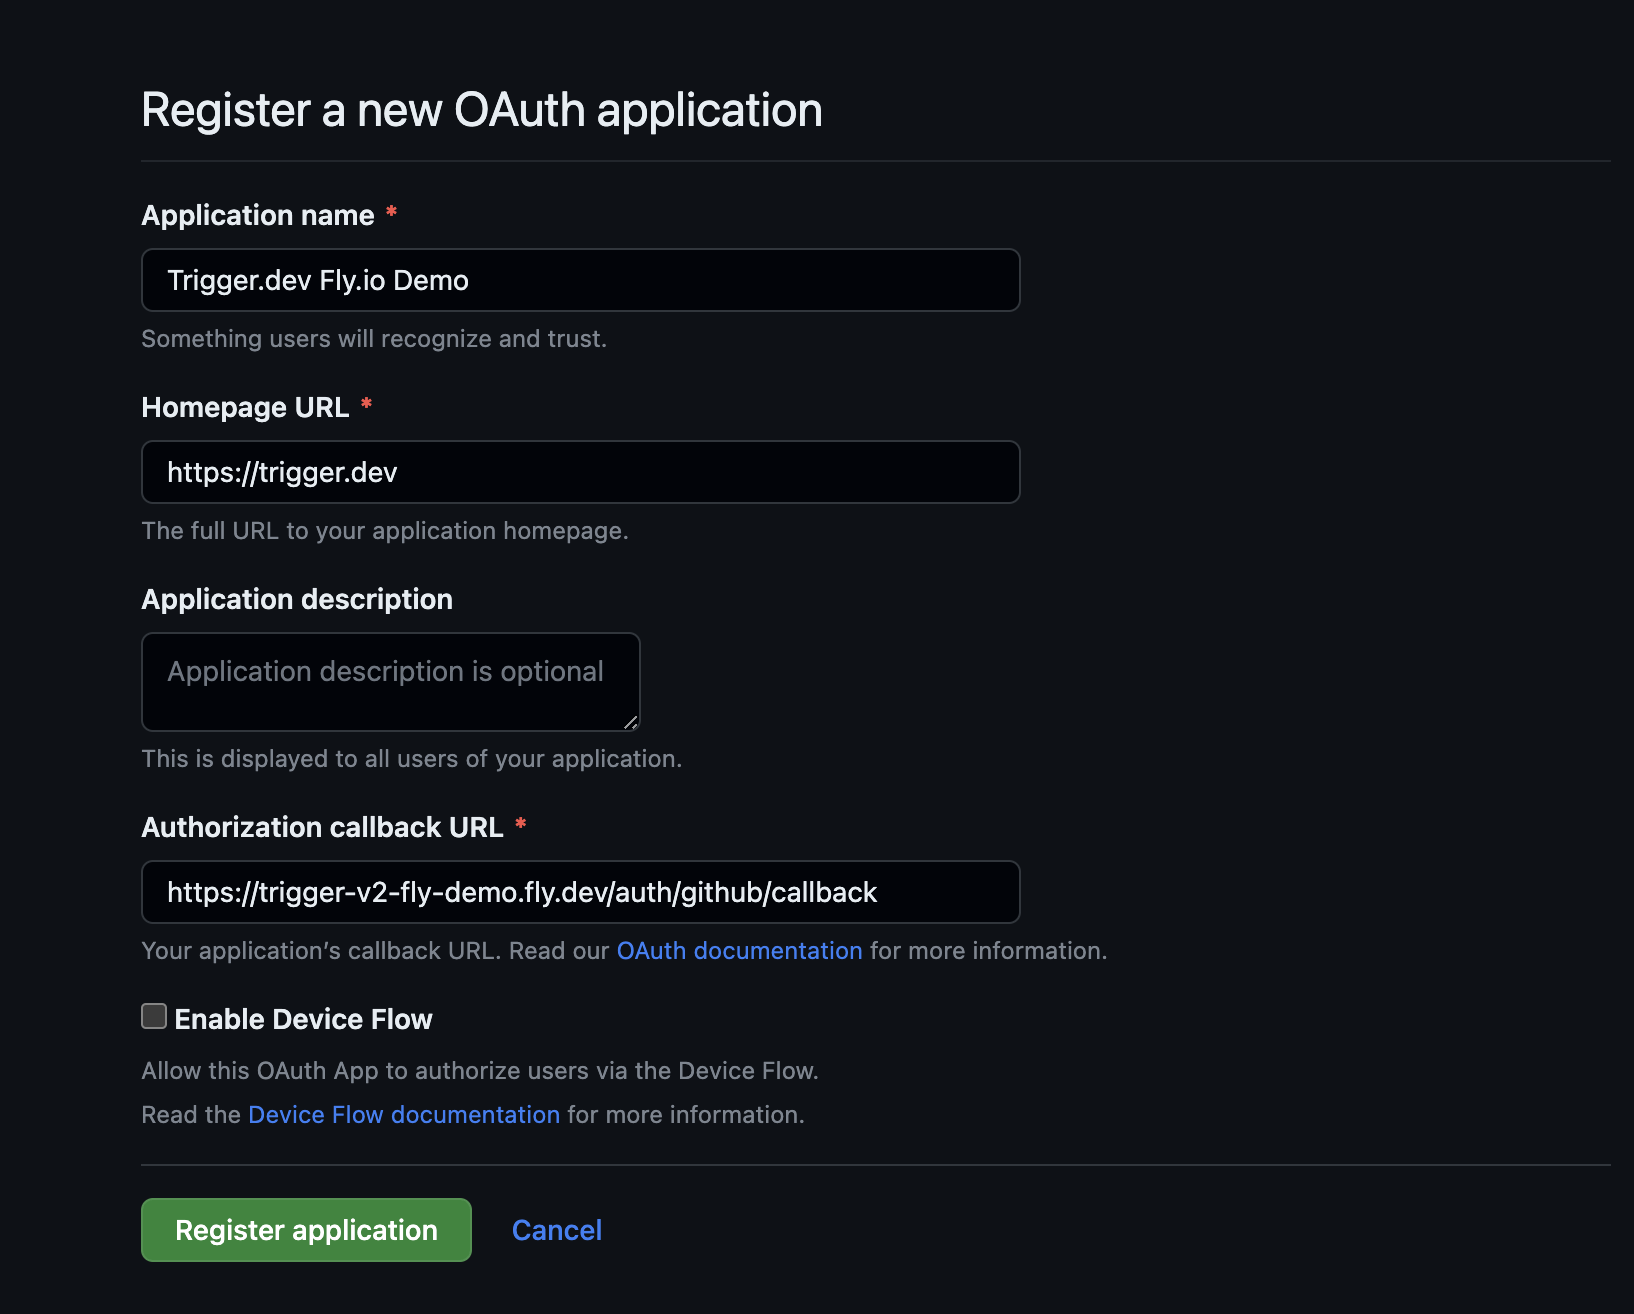
If you plan on logging in with GitHub auth, you’ll need to create a GitHub OAuth app with the following configuration:
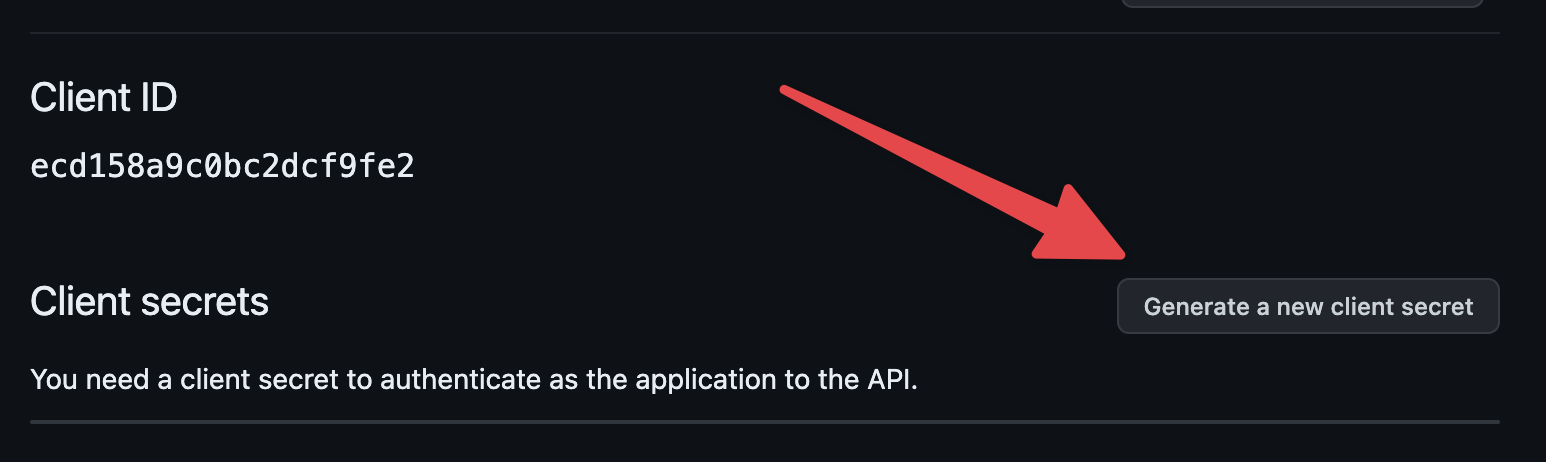
Once you register the application you’ll need to click on the “Generate new client secret” button:
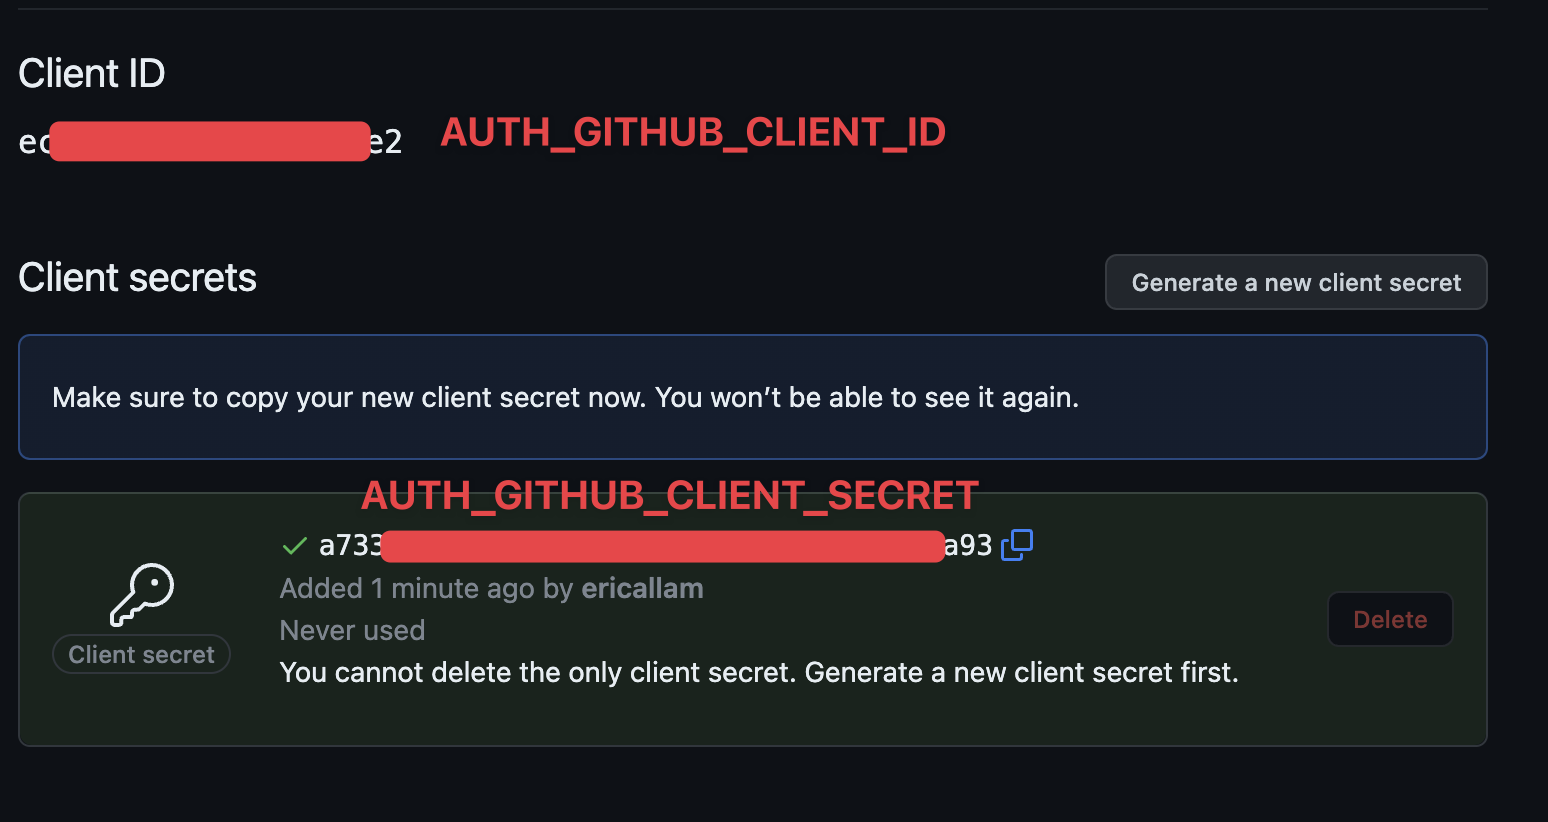
And then you can copy out the AUTH_GITHUB_CLIENT_ID and AUTH_GITHUB_CLIENT_SECRET:
RESEND_API_KEY, FROM_EMAIL and REPLY_TO_EMAILWe use Resend.com for email sending (including the magic-link signup/login system). They have a generous free tier of 100 emails a day that should be sufficient. Signup for Resend.com and enter the environment vars below
Now you can deploy to fly. Here we are setting the machine VM size to use 1 dedicated CPU core with 2 GB of memory, but you can run fly platform vm-sizes to see other options. The below app will cost about $30/month.
Once deployed, you should be able to open https://<your fly app name>.fly.dev/ in your browser and create an account, either using GitHub or a magic email link.
Next you can easily bootstrap your Next.js project to use your self-hosted instance of Trigger.dev.First, cd into your Next.js project, then run the @trigger.dev/cli init command to initialize your Next.js project:
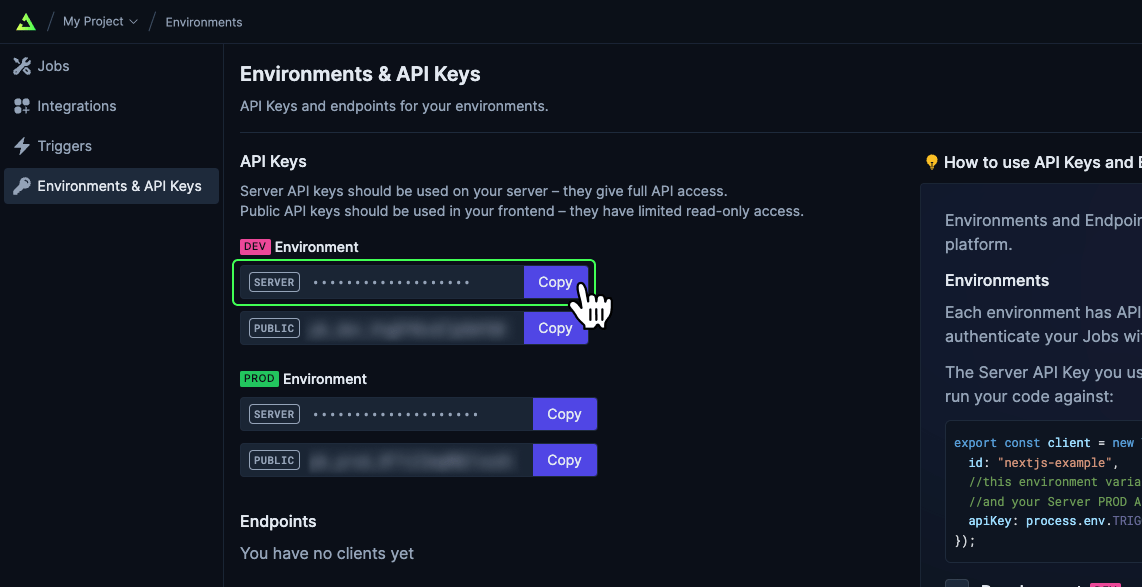
When it asks for your development API key, head over to your self-hosted Trigger.dev dashboard and select the initial project you created when signing up, and head to the Environments & API Keys page to copy your dev API key:
Run your Next.js project dev server with npm run dev and then in a new terminal window you will need to run the @trigger.dev/cli dev command to connect to your Trigger.dev instance and allow it to tunnel to your local Next.js server:
npx @trigger.dev/cli@latest dev
At this point you should be able to navigate to your Trigger.dev dashboard and view your registered jobs
Was this page helpful?
Assistant
Responses are generated using AI and may contain mistakes.